Publishing your Android Application to the Google Play Store in 3 easy steps
This guide is intended to show you how to publish your Android application to the Google Play Store while following best practices.
Before publishing an app to the Play Store, you will want to create a Google Play account and pay the one-time developer registration fee of $25. Once you have this taken care of, you can move onto the developer console and create your first application.
Suppose you have been working on application and you’re happy with how it currently works. After you have finished your application and created a developer account, you will be faced with a somewhat overwhelming list of requirements, but fear not! We will guide you through everything 😄
Android Studio Bundling
In Android Studio go to Build>Generate Signed Bundle. This will launch a pop up and you should choose Android App Bundle because of Google’s new Dynamic Delivery Model. With the Android App Bundle, Google optimizes for each device that the app is launched on. APK is just a singular instance of your application.
Key Store Generation
Every application you publish needs to be signed so that Google can verify that you, and only you, are publishing the app. In order to sign your application you can either let Google take care of it or you can have the key on your local machine. I am somewhat skeptical of Google so I would rather generate my own key and manage it.
1. Generate a key store which essentially behaves as a storage for all the unique keys of your application.

2. Create a key alias and a password.
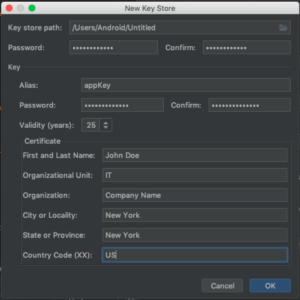
3. Make sure that you check this box so that your key can be used in the Play Console.

Google Play Console
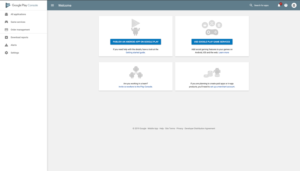
Hit the blue button that says publish an app on Google Play. You will need to check off the items from the left hand side before you can roll out your new app.
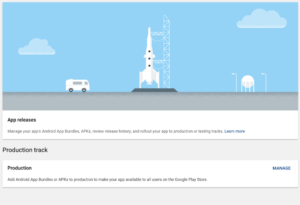
App Release:
Google has many tracks where your application can live. In this guide we will only discuss rolling your application out to production since it can very complex with A/B test, Alpha/Beta Launches, etc.
- Production: In the second step of this tutorial we will talk about Android Studios Bundling feature that makes it simple to create and sign an app bundle. More about that later. After all the other steps are finished you will be able to rollout your app to production
Store Listing: (Everything in this section is required)
- App Name: Short, sweet and memorable.
- Short Description: 80 characters specifying the basic functionality of your app. Here is your change to give someone an executive summary of your application.
- Long Description: Here you can give more in-depth details of your application and how you’re better than the competition!
- App Icon: What people will see first in the Play Store.
- Screenshots: Up to 8 screenshots per listing on the Play Store. Make them count.
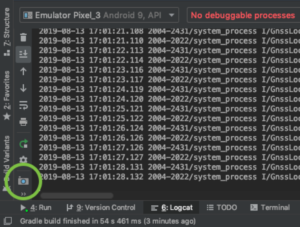
- Feature Graphic: Here you can display the key features of your application. It is recommended that you create a promotional video of your application in action to attract new users. Luckily Android has some tools that allow you to capture your app screen.Navigate to the bottom left of your Android Studio and click on the camera when you are ready to take a screenshot.
- Content Rating: After you upload your application and fill out the content rating survey on the left side of your dashboard, you must assign a rating to your app. We recommend going with the rating assigned by Google since they ultimately control what gets published onto the Play Store.
- Contact Email: If users need to contact you about any bugs in the application.
- Privacy Policy: Many App Distributors require apps to have a privacy policy. Google requires a privacy policy for applications that are published on the Play Store. In our experience we find it best to hire a lawyer and create a general privacy policy for all the apps you would want to publish. This ensures that you are not vulnerable for any lawsuits in the future.
Content Rating
After you upload the Bundle in the App Release section, you will be able to establish the content ratings of your application.
This process is fairly straightforward and if you answer everything truthfully, you will have no problems!
App Content
Is your app safe for kids? Do you allow there to be harmful content? Are there any ads on your application?
Pricing and Distribution
Which countries do you want your application to reach? Is your app free or is there some fee? For now we will assume you are publishing a free application to all the countries in the world since paid apps introduce another level of complexity. Make sure your application is GDPR Compliant if you’re distributing to the EU.
Launch
After all these tedious steps, you are ready to roll out your app to the Play Store. Head to the App Release section and roll your app out. It will take about a day for Google to review your application.
After your app is public, Google provides robust data analytics and crash report data about your application.